Installing R, RStudio, and others
You will do all of your work in this class with the open source (and free!) programming language R. You will use RStudio as the main program to access R. Think of R as an engine and RStudio as a car dashboard—R handles all the calculations and the actual statistics, while RStudio provides a nice interface for running R code.1
RStudio on your computer
Unfortunately this answer isn’t easy (and highlights why we’ll emphasize good reproducibility practices first). What’s important is for you to first figure out these three things: What is your operating system? What version of R do you have? What version of RStudio do you have? For the first two, type in For RStudio, I recommend having at least 1.4 or higher. It’s important to note that RStudio versioninig changed recently as the September release moved to a calendar based version (see this link for more details). So if you have the If you want a great overview, see Colin Gillespie and Robin Lovelace’s Efficient R programming package.I already have R and/or RStudio installed on my computer. What should I do?
sessionInfo() into R. At the top, you should see your R version and operating system. We’re going to work with R version 4.1.1. If you don’t have it, you can download it and RStudio will automatically find your new version of R.2021.09.0 or higher, you’re okay.
Likely. However, recognizing this first is the most critical step. There are a lot of helpful tutorials on how to navigate. A lot of it is contingent on what is your operating system. For example, there is a helpful R package for updating for Windows user ( For Mac or Linux users, this is more challenging. There are several helpful blog posts (see blog 1, blog 2) but I recommend Jenny Bryan’s advice. Try her instructions. If it doesn’t work out, reach out to me on Slack and we’ll work together.If I install a new version of RStudio, will I need to reinstall all of my packages?
installr website), which I highly recommend.
Here’s how you install all these things:
Install R
First you need to install R itself (the engine).
As of January 3, 2022, the most recent version of R is 4.1.2. Please install that version.
Go to the CRAN (Collective R Archive Network)2 website: https://cran.r-project.org/
Click on “Download R for
XXX”, whereXXXis either Mac or Windows: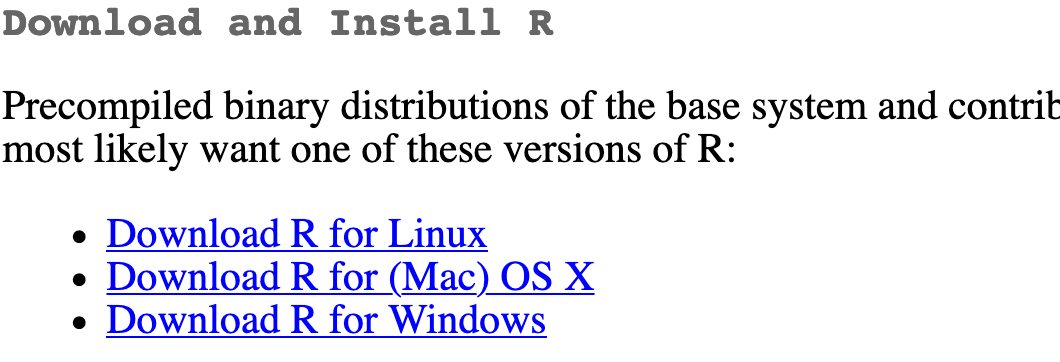
- If you use macOS, scroll down to the first
.pkgfile in the list of files (in this picture, it’sR-4.0.0.pkg; as of right now, the current version is also 4.1.2) and download it.
- If you use macOS, scroll down to the first

- If you use Windows, click "base" (or click on the bolded "install R for the first time" link) and download it. 
Double click on the downloaded file (check your
Downloadsfolder). Click yes through all the prompts to install like any other program.If you use macOS, download and install XQuartz. You do not need to do this on Windows.
Install RStudio
Next, you need to install RStudio, the nicer graphical user interface (GUI) for R (the dashboard). Once R and RStudio are both installed, you can ignore R and only use RStudio. RStudio will use R automatically and you won’t ever have to interact with it directly.
- Go to the free download location on RStudio’s website: https://www.rstudio.com/products/rstudio/download/#download
- The website should automatically detect your operating system (macOS or Windows) and show a big download button for it:
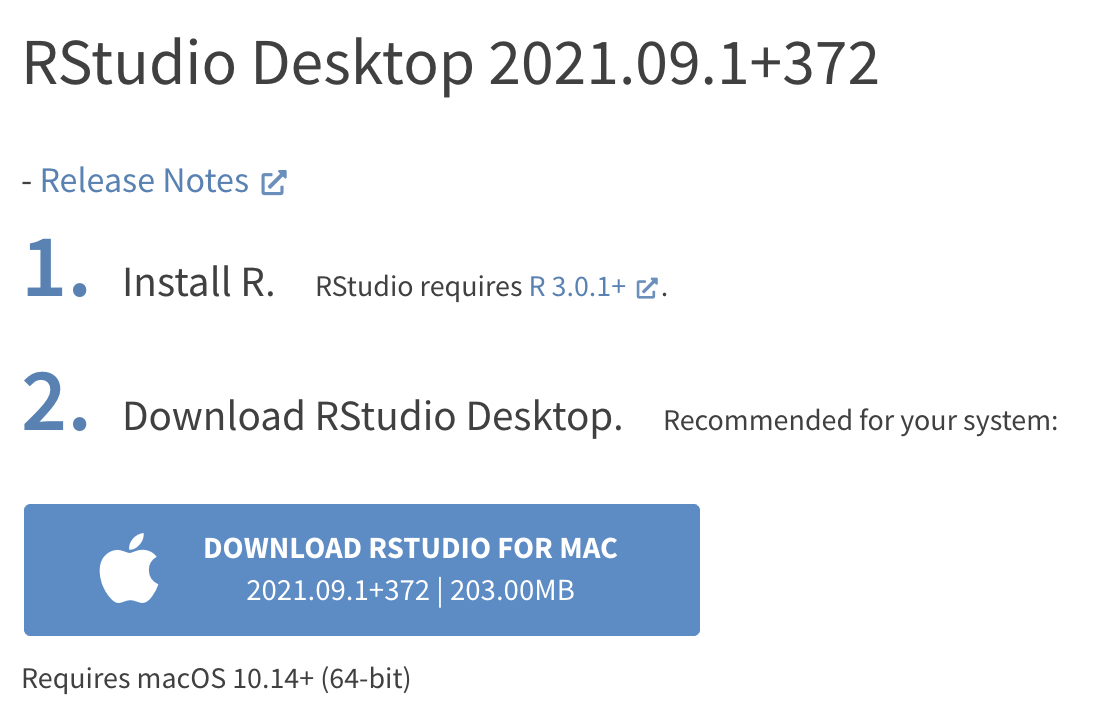
If not, scroll down a little to the large table and choose the version of RStudio that matches your operating system.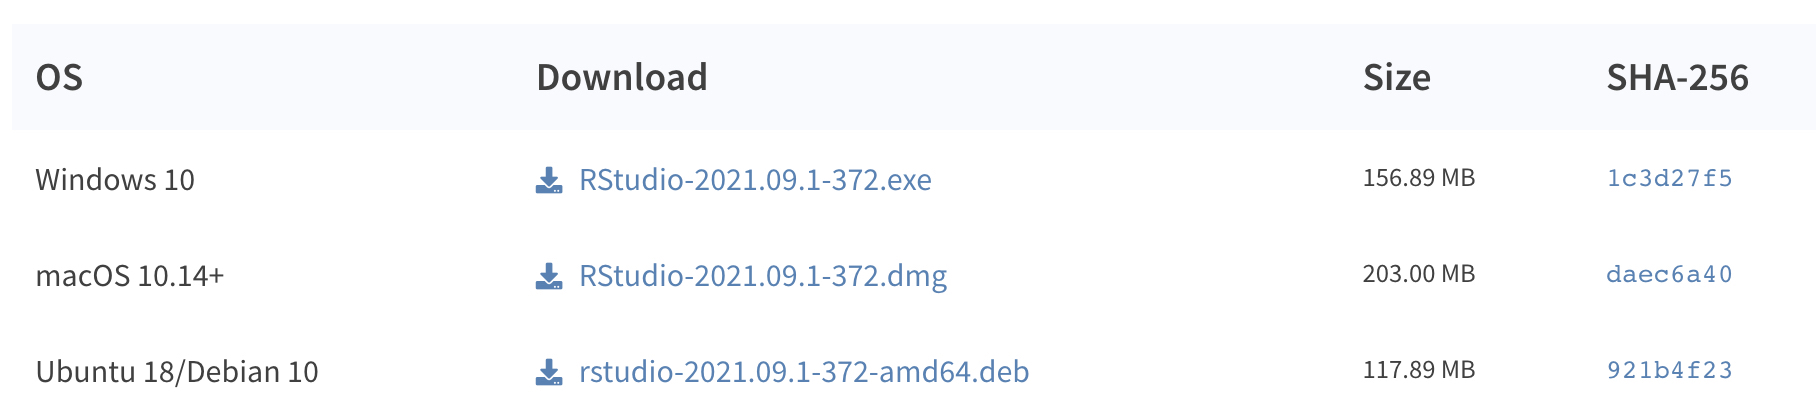
- Double click on the downloaded file (again, check your
Downloadsfolder). Click yes through all the prompts to install like any other program.
Double click on RStudio to run it (check your applications folder or start menu).
R Projects
Perhaps you have previously used R and/or RStudio before. However, very quickly many students immediately get a disorganized set of code, data, and files that become a headache for your future self (myself included when I was learning R!).
Instead, reproducibility is an incredibly important skill in data science (any programming language, not just R!) and using/maintaining projects as R Projects is a critical first step to mitigating these issues.
I recommend for this class, you create a unique R project uniquely for this class. I recommend on an easy access place like your Desktop.
Once you have completed all the steps above, to create your R project, click “File > New Project”.
R Environments renv
To avoid so much pain in package management, R has created the package renv to enable better management of packages. I highly recommend using it.
Like any other package, you’ll first need to install renv. Then you can follow these instructions from the renv website.
The general workflow when working with renv is:
Call
renv::init()to initialize a new project-local environment with a private R library,Work in the project as normal, installing and removing new R packages as they are needed in the project,
Call
renv::snapshot()to save the state of the project library to the lockfile (called renv.lock),Continue working on your project, installing and updating R packages as needed.
Call
renv::snapshot()again to save the state of your project library if your attempts to update R packages were successful, or callrenv::restore()to revert to the previous state as encoded in the lockfile if your attempts to update packages introduced some new problems.
Install tidyverse
R packages are easy to install with RStudio. Select the packages panel, click on “Install,” type the name of the package you want to install, and press enter.

This can sometimes be tedious when you’re installing lots of packages, though. The tidyverse, for instance, consists of dozens of packages (including ggplot2) that all work together. Rather than install each individually, you can install a single magical package and get them all at the same time.
Go to the packages panel in RStudio, click on “Install,” type “tidyverse”, and press enter. You’ll see a bunch of output in the RStudio console as all the tidyverse packages are installed.
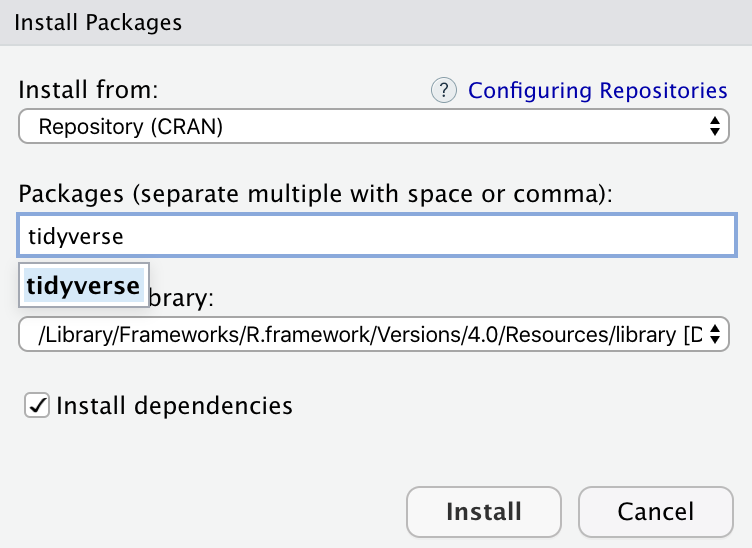
Notice also that RStudio will generate a line of code for you and run it: install.packages("tidyverse"). You can also just paste and run this instead of using the packages panel.
In this class, we may occassionaly use tidyverse but it’s not critical. We’ll discuss on the next resource the rethinking package that is more critical for our class.
Optional but Recommended Steps
For these steps, you are welcome to come back to this step later in the semester as this may be a lot for the first class.
RStudio + Git(Hub)
Related to our earlier part on reproducibility, Git (or version control tools like GitHub or BitBucket) are important in both research and industry. These allow checkpoint changes in code that enable better collaboration, transparency, and tracking for possible debugging.
There are multiple places to learn about Git, especially within RStudio. You are welcome to use Git in the terminal if you’ve used before, but for those new to Git, I highly recommend Jenny Bryan’s excellent tutorial: Happy with Git and GitHub for the useR.
A wonderful way to get started is to follow these instructions and push updates of your course work onto this GitHub. The great thing is that this keeps a backup copy of your work in case you ever have a major error or even lose your work.
Install tinytex
When you knit to PDF, R uses a special scientific typesetting program named LaTeX (pronounced “lay-tek” or “lah-tex”; for goofy nerdy reasons, the x is technically the “ch” sound in “Bach”, but most people just say it as “k”—saying “layteks” is frowned on for whatever reason).
LaTeX is neat and makes pretty documents, but it’s a huge program—the macOS version, for instance, is nearly 4 GB! To make life easier, there’s an R package named tinytex that installs a minimal LaTeX program and that automatically deals with differences between macOS and Windows.
Here’s how to install tinytex so you can knit to pretty PDFs:
- Use the Packages in panel in RStudio to install tinytex like you did above with tidyverse. Alternatively, run
install.packages("tinytex")in the console. - Run
tinytex::install_tinytex()in the console. - Wait for a bit while R downloads and installs everything you need.
- The end! You should now be able to knit to PDF.
These instructions were created by Andrew Heiss from his excellent Program Evaluation course website.↩︎
It’s a goofy name, but CRAN is where most R packages—and R itself—lives.↩︎